How to convert or migrate a WordPress site to Django
Have you ever come across a beautiful WordPress website and wish to convert it to Django? Or you have a website that is created in WordPress and you want to convert or migrate it to Django? In this comprehensive guide, we will learn how to convert or migrate a WordPress site to Django
In general, Django tends to outperform WordPress when it comes to website loading speed. This is because Django is a high-performance web framework written in Python, designed for building complex and high-traffic websites. It allows for more efficient and optimized code execution, resulting in faster loading times. WordPress, on the other hand, is a popular content management system (CMS) that is known for its ease of use and flexibility. However, due to its extensive use of plugins and themes, WordPress websites can sometimes become bloated and slow to load.
Ultimately, the loading speed of a website depends on various factors such as server configuration, caching mechanisms, image optimization, and overall website design. While Django is generally considered to have better performance capabilities, both platforms can be optimized to achieve fast loading speeds with the right techniques and tools in place.

Have you ever ask yourself or wonder why there are so many WordPress themes and plugins out there? Well.. that's because the folder structure of WordPress sites are very complicated so if you want to change or edit even a tinny piece of code on your site, you are going to need a plugin for that especially if you are new to coding. Trust me; even experienced developers are finding it very hard to understand and control WordPress sites.
In this article, I'm not really going to go into much details about Django and WordPress. If you are new to Django and want to learn, check out our Django introduction tutorial. You can also learn more about WordPress here
Django website versus WordPress
Before we dive into how to convert or migrate a WordPress site to Django, let's talk about the speed of the two platforms. For those of you who don't know me, I'm a full stack developer with 6 years of experience in WordPress and 3 years of experience in Python and Django. I'm currently working as a full-stack developer and a web hosting technical support engineer
- Lightweight framework: Django is a high-level Python web framework that is known for its performance and scalability. It is designed to be lightweight and efficient, making it faster than WordPress, which can sometimes be bloated with unnecessary features and code.
- Efficient coding practices: Django follows best coding practices and encourages developers to write clean and efficient code. This results in faster loading times and improved performance compared to WordPress, which may have less optimized code due to its wide range of themes and plugins.
- Built-in security features: Django comes with built-in security features, such as protection against common web vulnerabilities like SQL injection and cross-site scripting. This reduces the risk of security breaches and potential slowdowns caused by malicious attacks on the website.
- Scalability: Django is highly scalable, allowing websites to handle a large amount of traffic without sacrificing speed or performance. This scalability makes Django websites better equipped to handle high traffic volumes compared to WordPress sites.
- Superb caching mechanisms: Django has robust caching mechanisms that help improve website speed by storing frequently accessed data in memory. This reduces the time needed to retrieve data from the server, resulting in faster loading times for users.
Django websites are generally faster than WordPress websites due to several reasons:
WordPress is one of the most popular content management systems. WordPress is flexible and easy to use even if you don't know how to code. With WordPress, you can easily create a functional website in minutes without coding. If you are looking to create a simple personal website or blog with less effort, then WordPress is your best option.
However, if speed and security is your concern, then go for Django. Although I have been using WordPress for the past 6 years, Django has became my best programming language and I have already completed a dozen of projects in Django. Unlike WordPress; I have a full control over the source code of the entire website when developing in Django. Though it can be hard to hand-code in Django, your code will be neat, no unnecessary scripts, no plugins, no need to worry about frequent updates. Now let's learn how to convert or migrate a WordPress site to Django
How to convert or migrate a WordPress site to Django
As I already mentioned, creating a website in Django requires some coding skills as it doesn't support drag-and-drop features. You should really be familiar with Django if you're going to be managing the site on your own. But trust me; coding in Django is not as complicated as you might think and creating a website in Django is really straightforward and fun if you know HTML, CSS and some JavaScript. However, if you're creating a complex or data driven website like an e-commerce, then you should try to learn more advanced tools of Django
The second thing you want to be sure of before converting your WordPress site to Django is to make sure your web hosting provider's cPanel supports the Setup Python App option. This option allows developers to create and setup Python projects very easy. Most cPanels like the Scala Hosting currently does not support this feature.
Though there are alternatives ways to create Django and Python project through the cPanel, the process can be very challenging for beginners. If you don't a web hosting or you wish to change your current hosting provider, I recommend you signup with A2Hosting as they fully support the Setup Python App or you can signup for hosting through my other website Sitepare.com. Though we will be working with our local environment, I recommend you check to make sure all these are ready if you want to upload the site to the internet once the migration is completed.
To make this article more readable, I have broken this guide into two separate sections. In this first section of how to convert or migrate a WordPress site to Django, we will convert only the home page of the WordPress site into Django without other pages. In the next section of How to migrate WordPress pages/post to Django, we will then move all the rest of the pages, posts and other data from the WordPress site into the Django site. You can also watch the video version of this article here
There are various ways of migrating WordPress sites to Django, but I always choose to do things the hard way especially when it comes to coding. It takes a lot of hard working and time, but the end results is worth it. Even when creating WordPress sites, I try as much as I can to avoid using plugins and pre-made templates.
There are other plugins that can help make the migration easier and faster, but there are always errors, unused scripts, unwanted media files, and dead or broken links on every website and using a plugin to facilitate the migration means all these errors, unnecessary codes and dead links will also be migrated and I really don't like doing things this way.
Manually migrating the site can help you identify and fix these errors, optimized the code and boost the overall performance of the site. Alright; now let's learn how to convert or migrate a WordPress site to Django
How to convert or migrate a WordPress site to Django ( Step 1 )
The first step is to create a virtual environment for the project by running:
- py : This is the Python launcher command that helps in running Python scripts and managing Python installations on the system. It can be used to execute various Python tasks and manage different Python versions installed on the system.
- -m : This option is used with py to run a specific module as a script. In this case, we are using it to run the venv module.
- venv : This module is used to create lightweight "virtual environments" in Python. A virtual environment is an isolated environment where you can install packages and dependencies for a specific project without affecting the global Python installation.
- env : This is the name of the directory (or folder) where the virtual environment will be created. You can replace env with any other name you prefer for your virtual environment.
The command py -m venv env is used to create a virtual environment in Python using the built-in venv module. Here is a breakdown of the command and its components:
When you run the command py -m venv env , Python will create a new directory named venv (or the name you specified) in the current working directory. Inside this directory, Python will set up a fresh virtual environment with its own Python executable, site-packages, and other necessary files.
I want to setup my virtual environment on my desktop. For this, open your terminal or powerShell and navigate to the desktop by typing
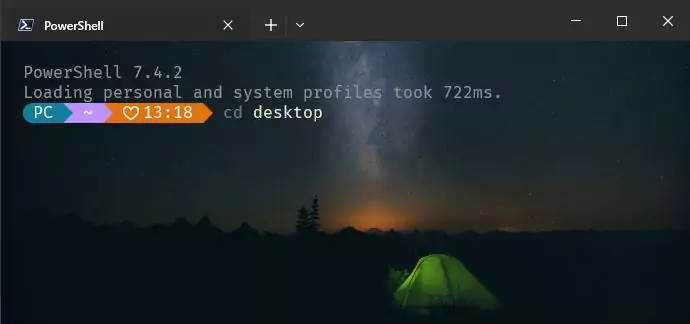
I have customized my windows terminal to look better so yours may look different than mine, but that's not a important. Just hit Enter and that should take you to your desktop. Now again on the terminal, type py -m venv env
If you get an error, this means Python or Django is not installed or properly configured on your machine. Kindly check out our comprehensive guide on how to install python and Django. If the py -m venv env execute without any errors, this means the virtual environment has been successfully created on our desktop. Now let's navigate into our newly created virtual environment and start creating our website
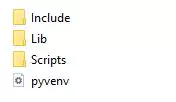
If you look on your desktop, you see a new folder named env . Inside this folder, there are three other folders and a Python script. These files are essential for our project though we won't be directly working on them.
Now let's start creating the site. On the terminal, navigate into the newly created virtual environment by typing cd env
Again; env is the name of our virtual environment so if you have named yours differently, remember to replace env with whatever name you used.
How to convert or migrate a WordPress site to Django ( Step 2 )
While inside the env, create a new project named test_site by running django-admin startproject test_site in the terminal
test_site is the name I choose for my website. Feel free to change this name to whatever name you prefer and make sure to follow the same naming structure. no space and no - . For example test-site and test site are invalid names so you will trigger an error. You should use _ to separate words or user the camelCase like testSite
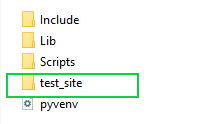
If you look in the env folder again, you should see a new folder with the name you specified. This is our main project folder which will contain all the parts of our website.
At this time, we can now start the Django server to see if our Django site is working. In the terminal, navigate into the newly created project folder test_site. The command is: cd test_site Once you're in the test_site folder, run py manage.py runserver This command will start the Django server
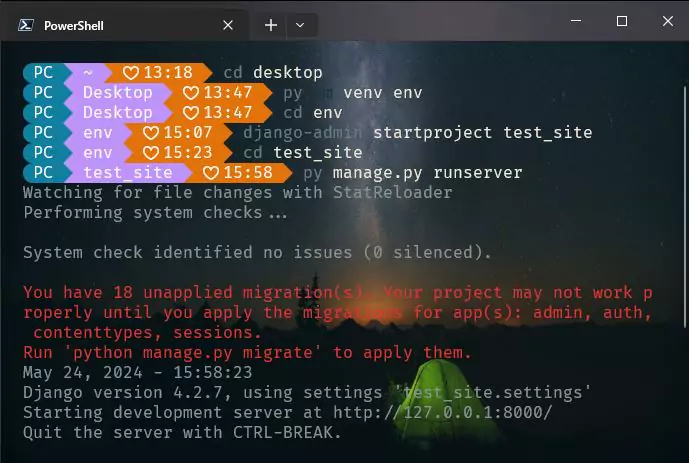
If you see a message in the terminal that looks like the image above, then congratulations! the server is running. To visit the site, press and hold down the ctrl key on your keyboard and then click on the http://127.0.0.1:8000/ in the terminal message. Or, you can simply open your web browser and enter 127.0.0.1:8000
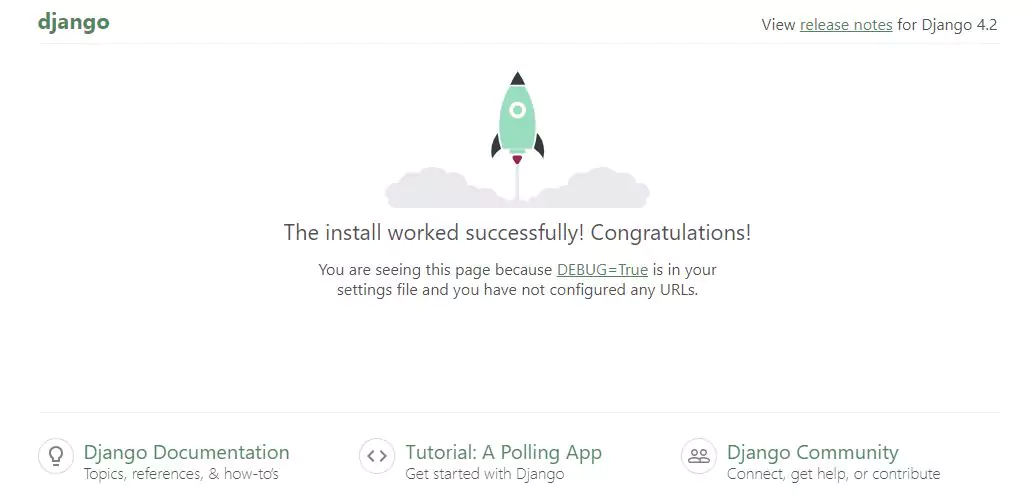
This should open up the default Django page. All we need to do now is to start customizing this page. So it's now time to start our WordPress site migration. Open the test_site folder with your favorite code editor and let's make some changes to the settings.py
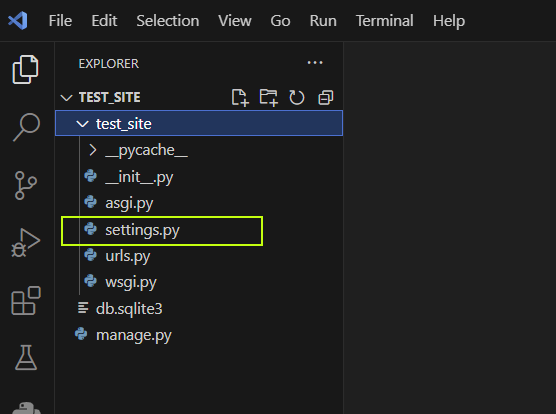
In the settings.py, add the following code at the top import os. You can place it before the from pathlib import Path line.
import os
On the same settings.py, scroll down to the TEMPLATES = [ ] section as shown below
            TEMPLATES = [
                {
                    'BACKEND': 'django.template.backends.django.DjangoTemplates',
                    'DIRS': [],
                    'APP_DIRS': True,
                    'OPTIONS': {
                        'context_processors': [
                            'django.template.context_processors.debug',
                            'django.template.context_processors.request',
                            'django.contrib.auth.context_processors.auth',
                            'django.contrib.messages.context_processors.messages',
                        ],
                    },
                },
            ]
Within the empty list literal, we need to add a piece of code that tells Django where to finds the template folder of our website. Within the empty list literal, add the following code.
Your code should now look like this:
            TEMPLATES = [
                {
                    'BACKEND': 'django.template.backends.django.DjangoTemplates',
                    'DIRS': [os.path.join(BASE_DIR, 'templates') ],
                    'APP_DIRS': True,
                    'OPTIONS': {
                        'context_processors': [
                            'django.template.context_processors.debug',
                            'django.template.context_processors.request',
                            'django.contrib.auth.context_processors.auth',
                            'django.contrib.messages.context_processors.messages',
                        ],
                    },
                },
            ]
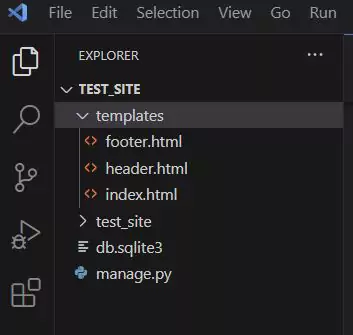
The templates which we specified is a folder that will contain all the templates of our website. Now we need to create this folder under the test_site folder where the manage.py is located
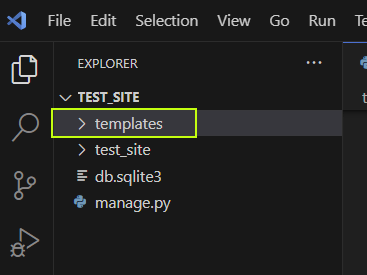
In this templates folder, we will create the template parts for our website like footer, header, index, sliders and any other templates you need. So let's the basic files; header, footer and the main index.html. It's fine to have all of these files in one single file, but I like to separate them to make the code easier to handle.
How to convert or migrate a WordPress site to Django ( Step 3 )
Django views and urls
We now need to configure the Django urls.py and views.py to display our templates instead of the default Django page. Return to the terminal and run django-admin startapp my_site to create the main website app. Again, my_site can be replaced with any name of your choose. Once on the terminal, make sure you're in the test_site folder before you run the command:
This will create a new folder named my_site . Inside this folder, create a new file called urls.py and leave it empty for now; we will return to it later. Next, look for urls.py file located in the test_site folder where the settings.py file is. The file look like this:
            from django.contrib import admin
            from django.urls import path

            urlpatterns = [
                path('admin/', admin.site.urls),
            ]
Add a comma next to the from django.urls import path and add include . Below the path('admin/', admin.site.urls), , add path('my_site/', include('my_site.urls')) . This will include the urls.py of the my_site . In all, the file should now look like this:
            from django.contrib import admin
            from django.urls import path, include

            urlpatterns = [
                path('admin/', admin.site.urls),
                path('', include('my_site.urls')),
            ]
Next, we need to work on the urls.py and the views.py of the my_site
In the views.py file located in the my_site Let's define a function that display our index.html file we created in the templates folder earlier. Past the code below into the views.py file located in the my_site folder. Make sure the code is indented as you see below.
        from django.shortcuts import render

        def homePage(request):
            return render(request, 'index.html')
Finally, open the urls.py file of the my_site and past the code below to it:
            from django.urls import path
            from . import views

            urlpatterns = [
                path('', views.homePage),
            ]
If the server is not running, start the server by running:
py manage.py runserver
Run the above command in the terminal and then reload the page. You should see a blank page. Great! that's the index.html file we created in the templates folder. The page is currently blank because we didn't add any text in the index.html file. If you open the index.html and type anything and reload the page again, you should see changes. Now it's time to migrate our WordPress site to Django
In this guide, I will convert one of my WordPress blog website into Django website. All we need to do now is to start exporting the html code of the WordPress site into out Django templates. We will export the header into our header.html , the main home page into our index.html and the footer into our footer.html
In WordPress, it's harder to get your hands on the main source code of the website due to the folder structure and how WordPress store data. There are some plugins out there that can help directly access the source code of the your WordPress site, but again, that will move all unnecessary code and broken links to our Django website.
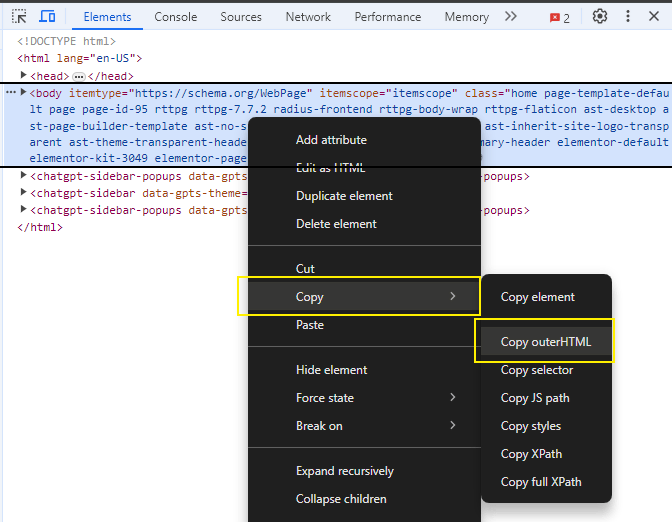
We will use the browser inspector tool to copy the html code of the site. This is the most efficient way to eliminate unused code, PHP code, identify errors and fix them on the fly. Visit your website and right-click to inspect the elements. Let's copy the entire html into our index.html including the header, main body and the footer. We will separate the header and the footer later.
First, open the index.html file located in the templates folder of our Django project. Open the file with your code editor and add the html boilerplate without the <body> and </body>
        <!DOCTYPE html>
        <html lang="en">
            <head>
                <meta charset="UTF-8">
                <meta name="viewport" content="width=device-width, initial-scale=1.0">
                <title>How to convert WordPress site to Django</title>
            </head>

        </html>
Now let's return to the inspector tool of the browser. Copy the header section from <body> to </body>
Return to the index.html of our Django and past the copied code right after the <head> tag. Don't worry about the indentation for now; we will fix this later as we go through the code to delete some unwanted code. If the server is not running, start it py manage.py runserver from the terminal and reload the page once again. You should see your website loaded. But it looks bad. To fix this, we need to import the css too from the WordPress to our Django project.
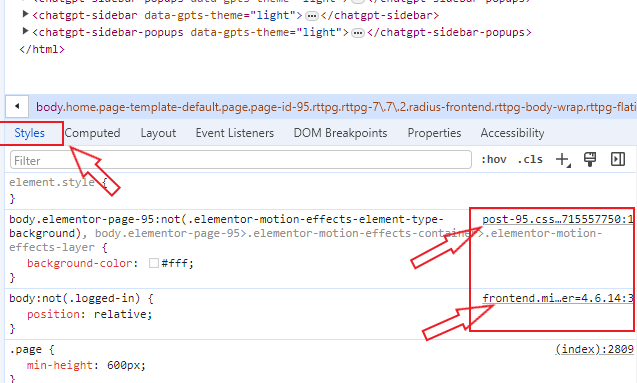
In WordPress, getting the exact css responsible for the front-end can be challenging because there are so many folders and css files. The browser inspector tool can help grab all the css files responsible for the front-end. So, let's return to the browser inspector tool and open the style tab. As you click on the html documents, you will see the corresponding css file. Clicking on the css link will open the css in a new tab
Let's return to our Django project and create a folder where we can place our css, JavaScript and images. In the test_site folder where the templates folder is located, create a new folder and name it static . Within the static folder, create a new folder and name it css and within this css folder, create a new file and name it style.css . you can give this file any name of your choice.
If you can pinpoint the css file of your website, all you need to do now is simply copy the css code and past it in to the style.css file we just created. If you can't find the css files of your site from the WordPress admin or folders, we can use the browser inspector tool as I showed you earlier. copy the css from the browser inspector tool and past it in the style.css file. remember; your WordPress site may contain more than one css file so you have to copy all of them from the inspector tool. If you are confused, kindly refer to the video guide
Now with all the css copied to our Django site, let's now link the css file to our site. In the templates folder of our Django project where we created the index.html file, create a new file and name it base.html . Open this file in your code editor and past the code below:
        <!DOCTYPE html>
            <html lang="en">
            {% load static %}
            <head>
                <meta charset="UTF-8">
                <meta name="viewport" content="width=device-width, initial-scale=1.0">
                <title> How to migrate WordPress to Django</title>
                <link rel="stylesheet" href="{% static 'css/style.css' %}">
            </head>
            <body>
                {% block main_site_content %}

                {% endblock main_site_content %}
            </body>
        <html>
If you don't know what the above code does, then I highly recommend you check my Django introduction guide. Now open the index.html file located in the templates folder. delete all the code we pasted there earlier. Now past this code there:
        {% extends 'base.html' %}

        {% block main_site_content %}

            <!-- Past the main website html here -->

        {% endblock main_site_content %}
Return back to your WordPress site and copy the html code from the browser inspector tool like we did previously. Copy from the <body> to the </body> . Once you copy the code, return to the index.html file and past the code between the {% block main_site_content %} and {% endblock main_site_content %}
Finally, open the settings.py file and scroll to the bottom. You will see a code that looks like this STATIC_URL = 'static/' . Right below that code, past this code there:
STATICFILES_DIRS = [os.path.join(BASE_DIR, 'static')]
That's it! If the server is still running, just reload the page and see your site working just fine and even faster than it loads in WordPress. If you encounter problems, make sure your files and folders are named correctly. If the css is not working, make sure you have copied all the css files from the browser inspector tool. Another way to check for your WordPress site css is by checking in the <head> tag. All css files are linked between the <head> and </head> tags. You can watch the video version of this guide as well
Our WordPress site has been successfully converted to Django and is working fine, but our index.html file is looking very bad. Let's make the code a little bit nicer. We can separate the header and the footer . We can also remove any <script> tags, <link rel='stylesheet> and all <style> tags from the index.html
How to convert or migrate a WordPress site to Django ( Step 4 )
Any plugins you install on your WordPress site may have some html codes, css, JavaScript and other links injected into the index.html . As you go through the index.html code, you can delete any code that is not relevant. Now let's start by separating the header and the footer sections from the index.html .
In the index.html code, cut from the <header> to the </header> and past it to the header.html file we created within the templates folder. If you can't find a </header> tag, simply cut the main div tag that wraps your website navigation menu and past it to the header.html . Do the same thing with the <footer> tag or any elements that wraps the footer of your website. Remove that section to the footer.html file.
separating the header and the footer from the main index.html file is completely optional; I just like organizing my code to make it more clean and readable. Setting it this way will also save you time because the same header menu and footer can be displayed across all pages. After removing these sections from the index.html , we now need to add a piece of code to the base.html to link the header and the footer . In the base.html file and just before the {% block main_site_content %} , past this code:
{% include 'header.html' %}
And after the {% endblock main_site_content %} , past this code:
{% include 'footer.html' %}
Your base.html file should now look like this:
        <!DOCTYPE html>
            <html lang="en">
            {% load static %}
            <head>
                <meta charset="UTF-8">
                <meta name="viewport" content="width=device-width, initial-scale=1.0">
                <title> How to migrate WordPress to Django</title>
                <link rel="stylesheet" href="{% static 'css/style.css' %}">
            </head>
            <body>

                {% include 'header.html' %}

                {% block main_site_content %}

                {% endblock main_site_content %}

                {% include 'footer.html' %}

            </body>
        <html>
How to convert or migrate a WordPress site to Django ( Static files )
Our WordPress website has been successfully converted to django and functioning just fine, but images are not loading. Let's fix this. Just like we did with the css, you have copy all the images of your WordPress in to the static folder. Inside the static folder, create a new folder and name it images . You can give this folder any name of your choice. Now copy all the images into this folder
Once all your images are ready in the images folder, now you display them in your website. In the index.html file, add this code at the very top of the code:
{% load static %}
Do the same thing with the header.html and the footer.html . Now let's assume you have an image called logo.png in your images folder. To display this logo, you would use the Django static :
<img src="{% static 'images/logo.png' %}" alt="logo image" srcset="">
Conclusion
That's it! We have successfully converted our WordPress website into Django. If you encounter any issues during the migration, don't hesitate to contact me for help. If your website contains pages, blog or other articles and you wish to migrate them all to your Django site, check our comprehensive guide on how to migrate WordPress pages/post to Django
Thank you for your time. Please share your thought about this article by commenting below.

(0) Comments
(2) Comments waiting moderation
To maintain a safer environment and keep our readers safe, all comments are held, manually reviewed before they are confirmed.